Getting Started with Simple Host: A Complete Step-by-Step Guide
 Simple Host Team

Ready to transform your restaurant's front-of-house operations? This comprehensive guide will walk you through everything you need to know to get up and running with Simple Host in just a few minutes.
What We'll Cover
Download & Create Your Account
Getting started with Simple Host takes less than 5 minutes:
Download the app from the App Store (iOS) or Google Play (Android). You can also use Simple Host in any web browser on desktop.
Create your account using your email address and a password.
Enter your restaurant details including your restaurant name and phone number.
Start building your floor plan — this is where the fun begins!
Pro Tip: Navigation Basics
Everything in Simple Host is accessible from two places: the menu button in the top right corner and the buttons in the bottom left. Once you know this, you can find anything!
Create Your Floor Plan
Your floor plan is the foundation of Simple Host. Here's how to set it up:
Access the floor plan editor — when you first start, you'll be guided to create your floor plan. Later, you can edit it from the top right menu.
Drag and drop tables from the left panel onto the floor grid.
Configure each table:
- Enter the table name (e.g., "Table 1", "Patio 3", "Bar")
- Set the seating capacity
- Rotate the table if needed to match your actual layout
Click "Done" in the top right corner when your floor plan is complete.
You can always come back and edit your floor plan as your restaurant layout changes.
Set Up Your Online Presence
Let guests join your waitlist or make reservations online by setting up your public pages:
Click the menu button in the top right corner.
Select "Online Settings" from the menu.
Go through the options and enter your restaurant information under the "Main Page" section.
Find your restaurant links at the top of the page — these are your unique URLs that guests can use.
Copy your links and add them to:
- Your restaurant's website
- Social media profiles
- Google Business Profile
Click "Save" in the top left when you're done.
App Settings
Customize Simple Host to fit your business needs:
Click menu → Settings to adjust options to match your workflow and preferences.
You're All Set!
With your floor plan, online presence, settings, and navigation down — you're ready to start using Simple Host! The sections below cover the day-to-day features you'll use to manage your restaurant.
Managing Reservations
Adding and managing reservations is simple:
Click "Reservations" in the bottom left.
Click the plus sign (+) to add a new reservation.
Enter the guest details: name, party size, phone number, date, and time.
Save the reservation.
To Seat a Reservation
- • Click on the reservation, then click "Seat"
- • Choose table(s) and server from the left
- • Click "Done" in the top right
To Plan Tables Ahead
- • Click on the reservation, then "Reserve Table"
- • Choose the table(s) for the party
- • Click "Done" in the top right
Tip: You can also tap any table on your floor plan and click "Reserve" to create a reservation directly for that table.
Managing the Waitlist
Your waitlist works similarly to reservations:
Click "Waitlist" in the bottom left.
Click the plus sign (+) to add a new party.
Enter the guest details including their phone number for SMS notifications.
Save to add them to the waitlist.
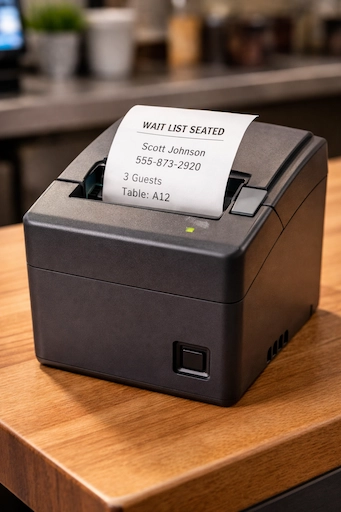
When their table is ready, you can notify them via SMS with one tap.
Automatic Guestbook
Any guest added to the waitlist or reservations with a phone number is automatically added to your Guestbook. No extra work required!
Adding Servers & Sections
To Add Servers
- 1. Click "Servers" in the bottom left
- 2. Click the plus sign (+)
- 3. Enter their name and save
To Assign Sections
- 1. Click menu → "Edit Sections"
- 2. Choose a server from the left
- 3. Tap tables to assign them
- 4. Click "Done" when finished
Combining Tables
For larger parties, you can combine multiple tables:
Click the menu button in the top right.
Select "Combine Tables".
Choose at least two tables to combine.
Options will appear on the left for your combined table.
Click "Done" in the top right to save.
Visual Table Reservations
Simple Host offers a powerful visual way to manage table reservations:
Click the menu button in the top right.
Select "Table Reservations".
Choose a date and time.
Click on the grid where you want to reserve a table.
Drag the left or right side of the reservation to extend or shorten the duration.
Block the Table
Reserve without a guest — for cleaning, VIP holds, etc.
Create a Reservation
Attach guest details to that time slot
This visual timeline makes it easy to see your entire day at a glance and optimize your seating.
Using the Guestbook
Your Guestbook is a powerful CRM for your restaurant:
Auto Tracking
Visits, no-shows logged
Add Tags
Birthday, allergies, etc.
Flag Guests
Alert your team
VIP Status
Special treatment
Access the Guestbook from the top right menu to search and manage your guest database.
Viewing Statistics
Track your restaurant's performance with built-in analytics:
Click menu → Statistics to view:
Server Data
Covers served, table turns
Table Data
Most popular tables
Reservation Data
Trends, no-show rates
Choosing a Subscription
When you're ready to unlock all features, click menu → Shop:
Basic
$49.99/mo
Essential features for getting started
Professional
$69.99/mo
Includes online reservations
VIP
$99.99/mo
Everything including online waitlist
You're Ready to Go!
That's everything you need to know to get started with Simple Host. Remember, our support team is available via chat and email if you ever need help. We typically respond within minutes.
Welcome to Simple Host — we're excited to help you run a smoother, more efficient front of house!
Ready to get started?
Download Simple Host and set up your restaurant in under 5 minutes. Free 7-day trial, no credit card required.
Simple Host Team
The Simple Host team is made up of restaurant industry veterans and tech experts dedicated to making restaurant management easier for everyone.